

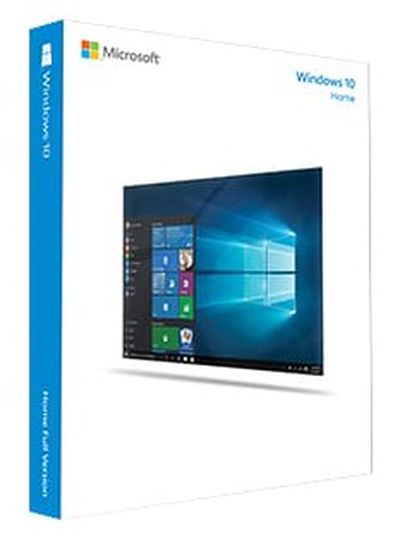
 Following the launch of Windows 10, Apple updated Boot Camp to support the latest Windows operating system on select Mac computers from 2012 and newer. If you've always wanted to try Windows on your Mac and think that now is the time to finally take the plunge, we can help you get through the basics with our how-to guide for installing Windows 10 on your Mac using Apple's Boot Camp Assistant.
This guide assumes you are installing Windows on your computer for the first time.
What You Need
You will, of course, need Windows 10, which can be purchased from Microsoft for $119. Older Mac computers support older versions of Windows, but won't work with Windows 10.
Make sure to check the system requirements for the version of Windows you want to install to ensure your Mac meets or exceeds them. You can find out the system specs for your Mac using System Information, accessible by typing "System Information" into a Spotlight search or using the Apple menu to go to About This Mac --> System Report.
To install Windows 10 (or Windows 7 or 8 for that matter) you will need at least 30 GB of free space on your startup drive and you'll need a keyboard and a mouse or trackpad to use with your computer.
If you're running OS X El Capitan and have an 11- or 13-inch MacBook Air, a 13- or 15-inch MacBook Pro or the Mac Pro, there's no need for a USB drive. If you're running a different version of OS X or have an older Mac, you'll need a 16 GB flash drive that doesn't have anything you don't want erased on it (Boot Camp Assistant automatically reformats the flash drive).
Creating a Disk Image File
On supported Macs running OS X El Capitan, Boot Camp comes with a modified interface that places the ISO image selector and partitioning on a single screen, allowing a user to easily select an ISO image and partition their hard drive before installing Windows. Once Boot Camp Assistant completes its tasks, the computer restarts with the normal Windows installation processes.
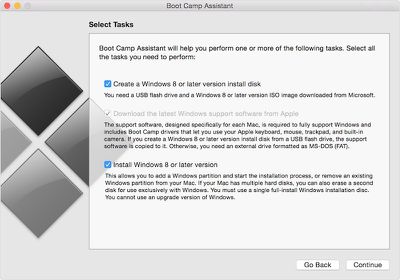
However, if you are not running El Capitan on a supported Mac, or are still running OS X Yosemite, Boot Camp Assistant requires a disk image file of Windows (not on DVD or a flash drive). The easiest method is to purchase the Windows ISO instead of the DVD version. However, if you don’t have a disk image file, create one by following the steps below.
- Insert the DVD or USB flash drive into your Mac.
- After the media appears in Finder, open Disk Utility and select the install file in the pop up window.
- Click the New Image icon at the top of the window.
- When the dropdown window appears, select DVD/CD master under Image Format and choose "none" from the Encryption option.
- Name the file and click Save. Wait for the program to create an image file.
- When the image file has been created, safely eject your DVD or USB flash drive.
- Find the newly created disk image file and select it. Then press Enter or Return on your keyboard to rename the file extension from .cdr to .iso. Select "Use .iso" to verify the change.
Set Up a Windows Partition
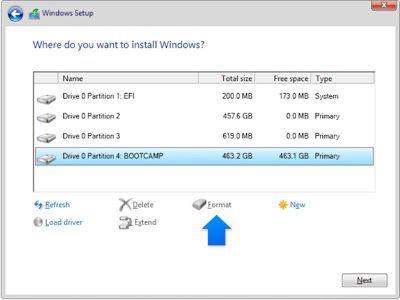
Before you install Windows on your Mac, you will need to create and format a partition. Use Boot Camp Assistant to create the partition and Windows installer to format it.
- Open Boot Camp Assistant to have the program automatically create the partition for you. It can be found in the Utilities folder of your Applications folder. Or, search for Boot Camp Assistant in Spotlight. Remember that the partition must have at least 30 GB of space.
- Format the partition using Windows. After Boot Camp Assistant creates the partition on your Mac, when you are asked where you want to install Windows, select BOOTCAMP. Then, click Format. Windows will automatically format the partition.
Install and Restart
The final step is to install Windows on your computer following the on-screen prompts. Then, restart your computer. You can switch between OS X and Windows using the Startup Manager. While your computer is restarting, immediately press and hold the Option key. After a few seconds, you should be able to choose which operating system you wish to use (either Macintosh HD or Boot Camp).
If you are in Windows and want to switch back to OS X, use the Boot Camp system tray. Click the Boot Camp icon in the system tray and then select "Restart in OS X" from the dropdown menu.
Uninstall Windows 10
If you change your mind, or realize that the 30 GB of space can be better utilized for some other purpose, you can uninstall Windows 10 and restore your disk to a single partition.
- Start your Mac in OS X. Quit all apps and log out any other users.
- Open Boot Camp Assistant and click Continue
- Select "Remove Windows 7 or later version" and click Continue.
- Click restore.



Top Rated Comments